VMware Restore
Recover your VMware virtual machines from your IDrive® 360 account or local backup using Online Restore or Local Restore.
- Sign in to the IDrive® 360 desktop application.
- Go to 'Server Backup' > 'VMware' > 'VMware restore' > 'Online Restore'.
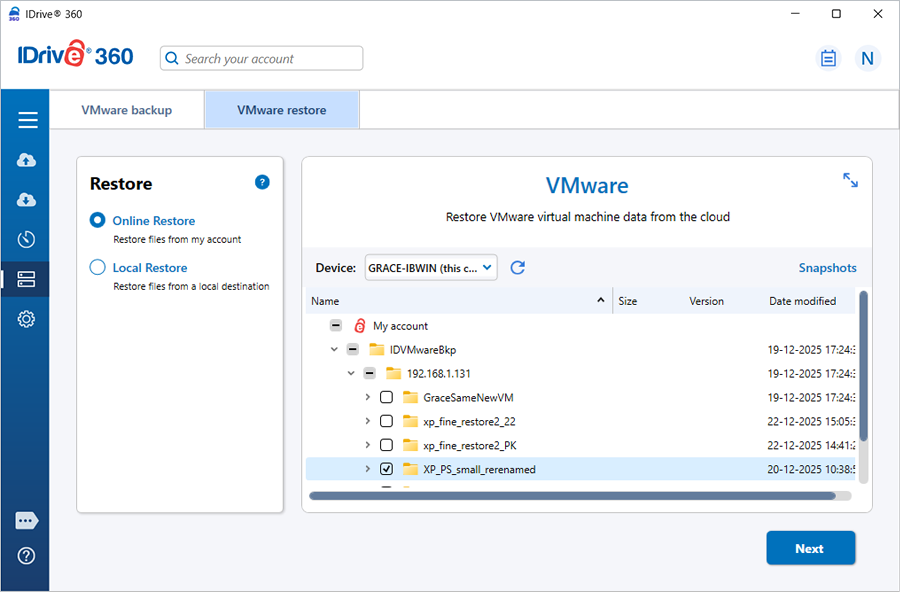
- Select the virtual machine from the 'IDVMwareBkp' backup set folder and click 'Next'.
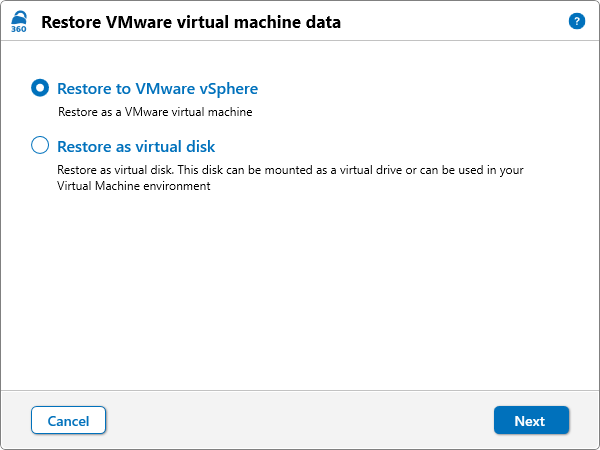
- In the 'Restore VMware virtual machine data' dialog, select one of the following restore options:
- 'Restore to VMware vSphere'
- 'Restore as virtual disk'
Restore virtual machines using Online Restore
To restore a virtual machine using Online Restore:
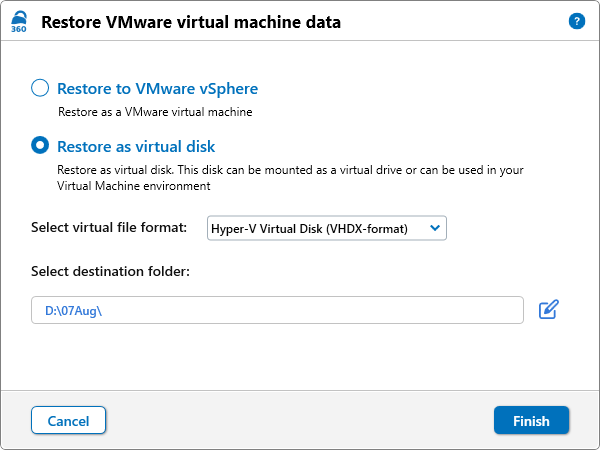
- Select the required virtual disk format:
- RAW image
- VHD
- VHDX
- Select the destination folder where you want to restore the virtual disk.
- Click 'Finish' to start the restore.
Restore as virtual disk
If 'Restore as virtual disk' is selected,
A restore summary is displayed after the operation completes successfully.
- Click 'Next'.
- Enter the VMware server credentials and click 'Connect'.
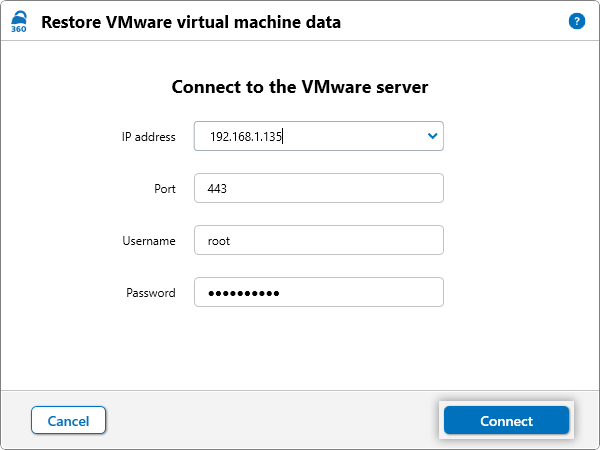
- If the credentials are for a vCenter server, the 'Target Host' list appears. Select the required ESXi host and click 'Next'.
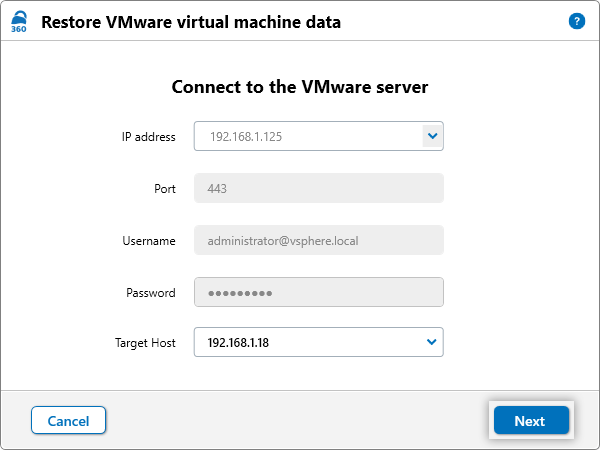
- If the credentials are for an ESXi host, the 'Restore VMware virtual machine data' dialog appears.
- Select the datastore where the virtual machine should be restored.
- Select the required power state:
- 'Power off the VM before restore'
- 'Ignore and continue (the restore fails if the VM is powered on)'
- 'Power on the VM after successful restore'
- Click 'Next'.
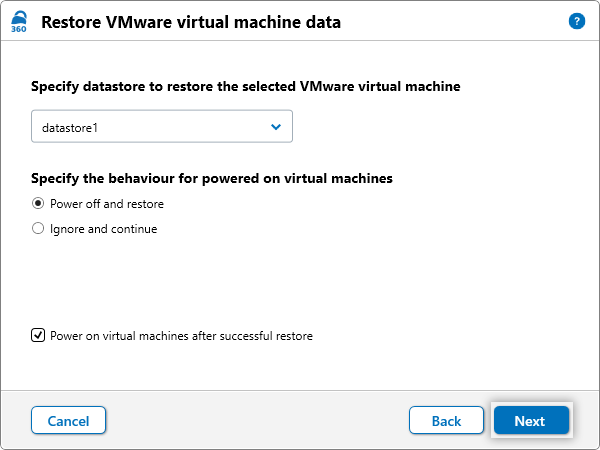
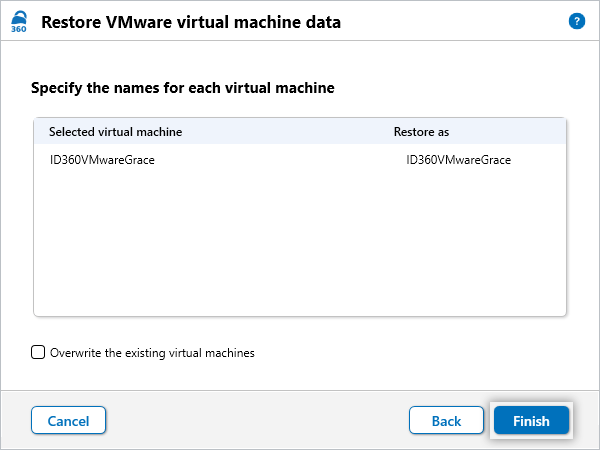
- In the 'Restore VMware virtual machine data' dialog:
- By default, 'Existing machine' is selected.
- To overwrite an existing virtual machine, select 'Overwrite the existing virtual machines'.
- To restore the virtual machine with a different name, modify the VM name under 'Restore as'.
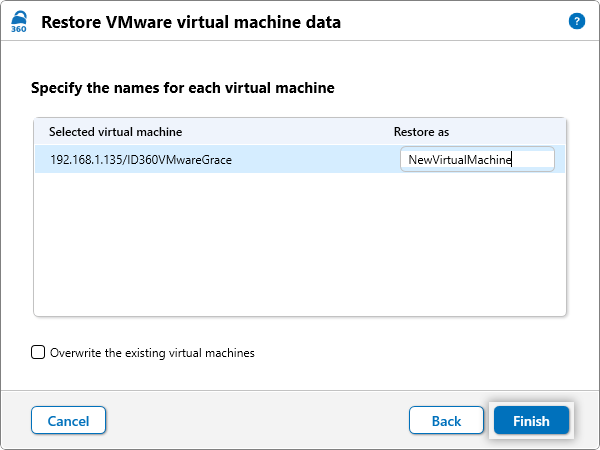
- Click 'Finish' to start the restore.
Restore to VMware vSphere
If 'Restore to VMware vSphere' is selected:
A restore summary is displayed after the operation completes successfully.
- Sign in to the IDrive® 360 desktop application.
- Go to 'Server Backup' > 'VMware' > 'VMware restore' > 'Local Restore'.
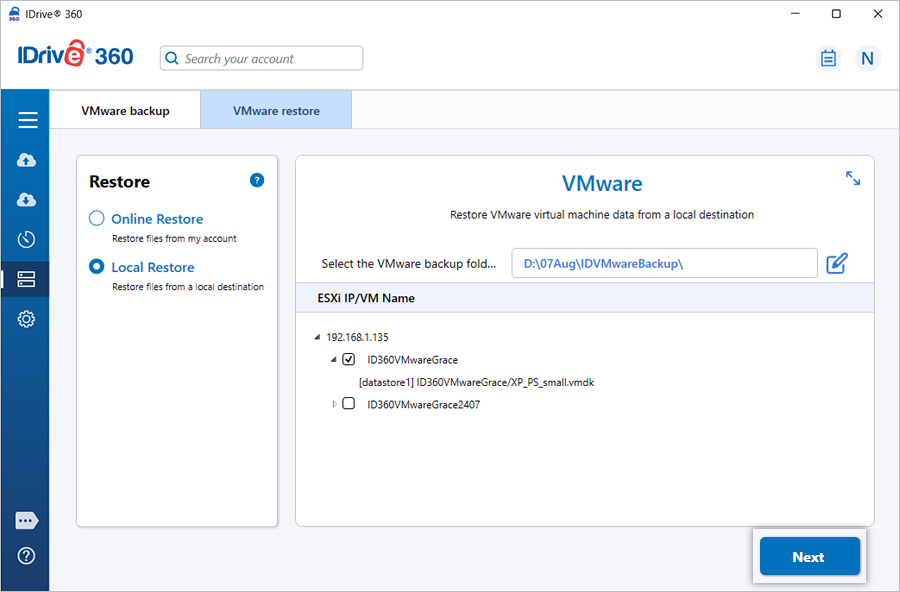
- Locate and select the 'IDVMwareBackup' or 'IDVMwareBkp' backup set folder from your local drive.
- Select the required virtual machine from the backup set and click 'Next'.
- Enter the VMware server credentials and click 'Connect'.
- If the credentials are for a vCenter server, the 'Target Host' list appears. Select the required ESXi host and click 'Next'.
- If the credentials are for an ESXi host, the 'Restore VMware virtual machine data' dialog appears
- In the 'Restore VMware virtual machine data' dialog:
- By default, 'Existing machine' is selected.
- To overwrite an existing virtual machine, select 'Overwrite the existing virtual machines'.
- To restore the virtual machine with a different name, modify the VM name under 'Restore as'.
- Click 'Finish' to start the restore.
Restore virtual machines using Local Restore
IDrive® 360 supports restoring VMware virtual machines using Local Restore to ESXi or vCenter servers.
To restore a virtual machine using Local Restore:
A restore summary is displayed after the operation completes successfully.
Note: When connected to a vCenter server, the 'Target Host' list displays the ESXi hosts available through the selected vCenter server.